Syncing Bookmarks with Floccus

Keeping your bookmarks organized and accessible across multiple devices can often be a challenge. If you’re looking for a seamless way to sync your bookmarks, Floccus is an excellent option—especially if you use Nextcloud. In this guide, I’ll walk you through the process of setting up Floccus to sync bookmarks effectively.
Step 1: Install Floccus
Before you can start syncing your bookmarks, you need to install the Floccus add-on. You can download it from the Chrome Web Store here.
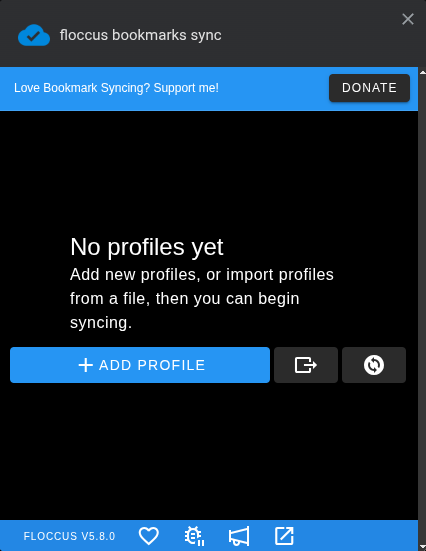
Step 2: Open Floccus and Add a Profile
To get started, open the Floccus add-on in your browser. You’ll find an option to Add Profile. Click on this to begin setting up your bookmark synchronization.
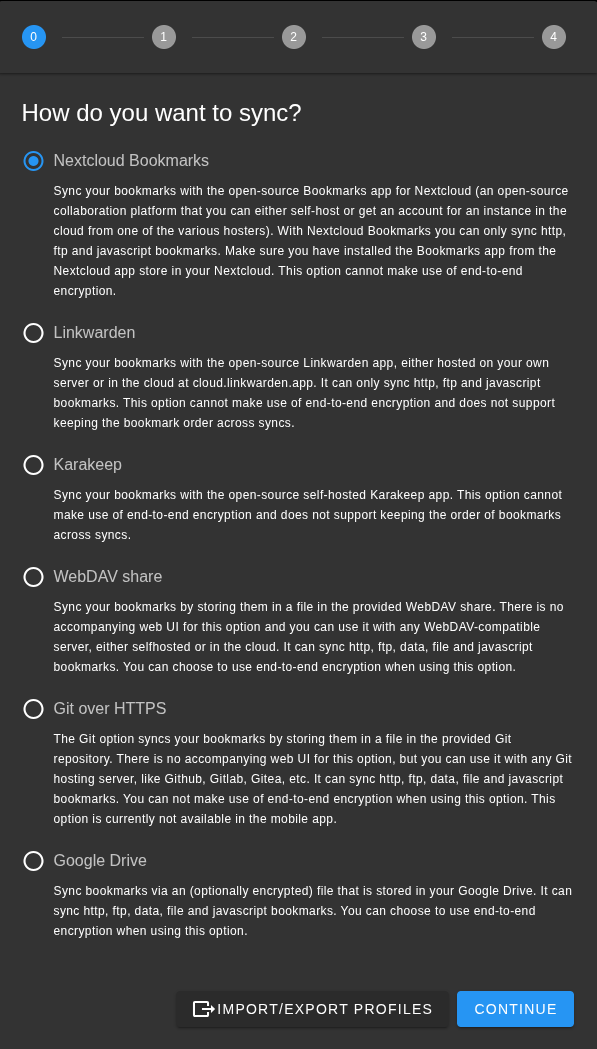
Step 3: Choose Your Preferred Service
Next, you’ll need to select your preferred service for syncing bookmarks. For this guide, we’ll use Nextcloud as an example.
Step 4: Clear Existing Bookmarks in Vivaldi
Before proceeding, it's essential to ensure that your Vivaldi bookmarks are deleted to avoid duplicates. Go through your bookmark manager and remove all existing bookmarks that you no longer need.
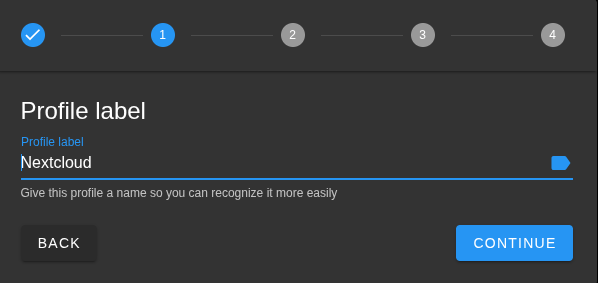
Step 5: Set a Profile Label
Once you’re ready to continue, you’ll be prompted to set a profile label. This label helps you identify different profiles for various purposes. For example, you might choose something like Work or use a direct reference to Nextcloud.
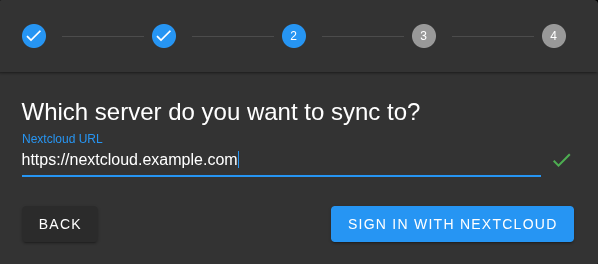
Step 6: Enter Domain Name and authorize
In the following steps, you’ll need to input the domain name of your Nextcloud server along with your password. Make sure this information is correct to avoid synchronization issues.
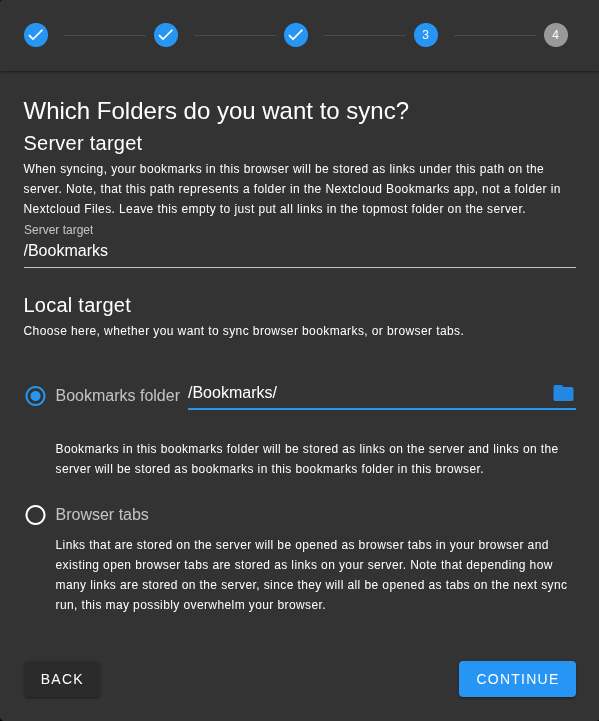
Step 7: Set the Server Target
In this step, you will specify the server target and the local target for your bookmarks. Floccus uses the Bookmarks app of Nextcloud, so make sure it is installed first. If you want to sync your bookmarks with the root folder in Nextcloud Bookmarks, you would use “/”. For better organization, I recommend using a subfolder, such as /Bookmarks, to keep everything neatly arranged. If you add /Bookmarks as your local target the bookmarks will appear in your bookmarks bar, making it easy to access your synced bookmarks whenever you need them.
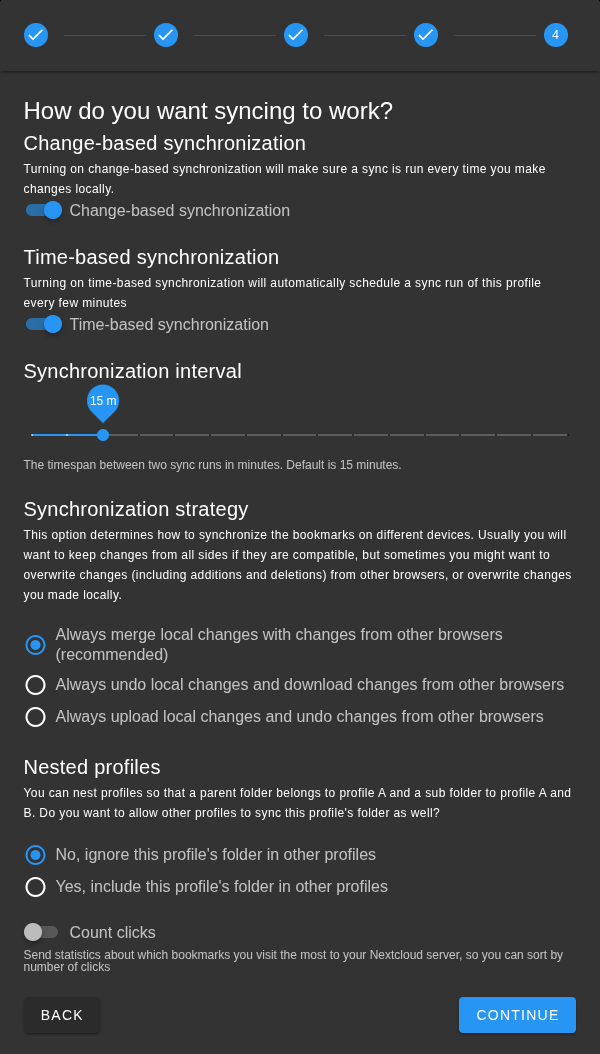
Step 8: Adjust the Sync Settings
The next window requires you to customize your sync settings. While many settings can remain as default, I recommend changing the "Nested Profiles" value to "No, ignore this profile's folder in other profiles." This adjustment will help keep your bookmarks organized and prevent unnecessary duplication within your nested folders.
Step 9: Finishing Up
After configuring your settings, finish up by closing the setup window. You should now see a sync icon in the Floccus add-on. Clicking this icon will sync your cloud-saved bookmarks, making them accessible right from your browser.

Conclusion
Syncing bookmarks with Floccus and Nextcloud can dramatically simplify your browsing experience. With organized access to your favorite links across devices, managing your digital life becomes much more efficient. Follow this guide, and you’ll be well on your way to a clutter-free bookmark experience!
Implement these steps today and streamline your browsing with synced bookmarks!